Chromatic Aberration, It’s something photographers have to deal with. Luckily for us it is very simple (in most cases) to get rid of chromatic aberration in Photoshop. It is as simple as a few mouseclicks really. Wanna know how? Continue reading.
Chromatic Aberration occurs when your lens can’t handle the huge differences in contrast. This is what causes ugly color fringing. Most of the cases the fringing is purple or sometimes green, depends what you are shooting. In practical terms: imagine you are shooting indoor and inside it is very dark. There are windows. After you did the shot and hook your camera up to your PC you notice ugly purple lines around the windows. This is called purple color fringing. This happens mostly with cheap camera bodies or lenses but to be honest it can happen anytime. Lets try to get rid of it because let’s be frank; nobody wants this.
- Open your image in Photoshop or create your HDR in Photoshop and edit this in Camera RAW
- Go to the tab that resembles a lens and when you do, please click on it
- There is an option here called defringe. There is also a purple slider, The further you drag it to the right the less fringing!
- Move the slider to the right until the fringing is no more
- Add this to your workflow so you won’t forget about it!
When this does not help you can also remove the color purple as long as there is no purple in your image that is not color fringing.
Of course the much needed visual aid:
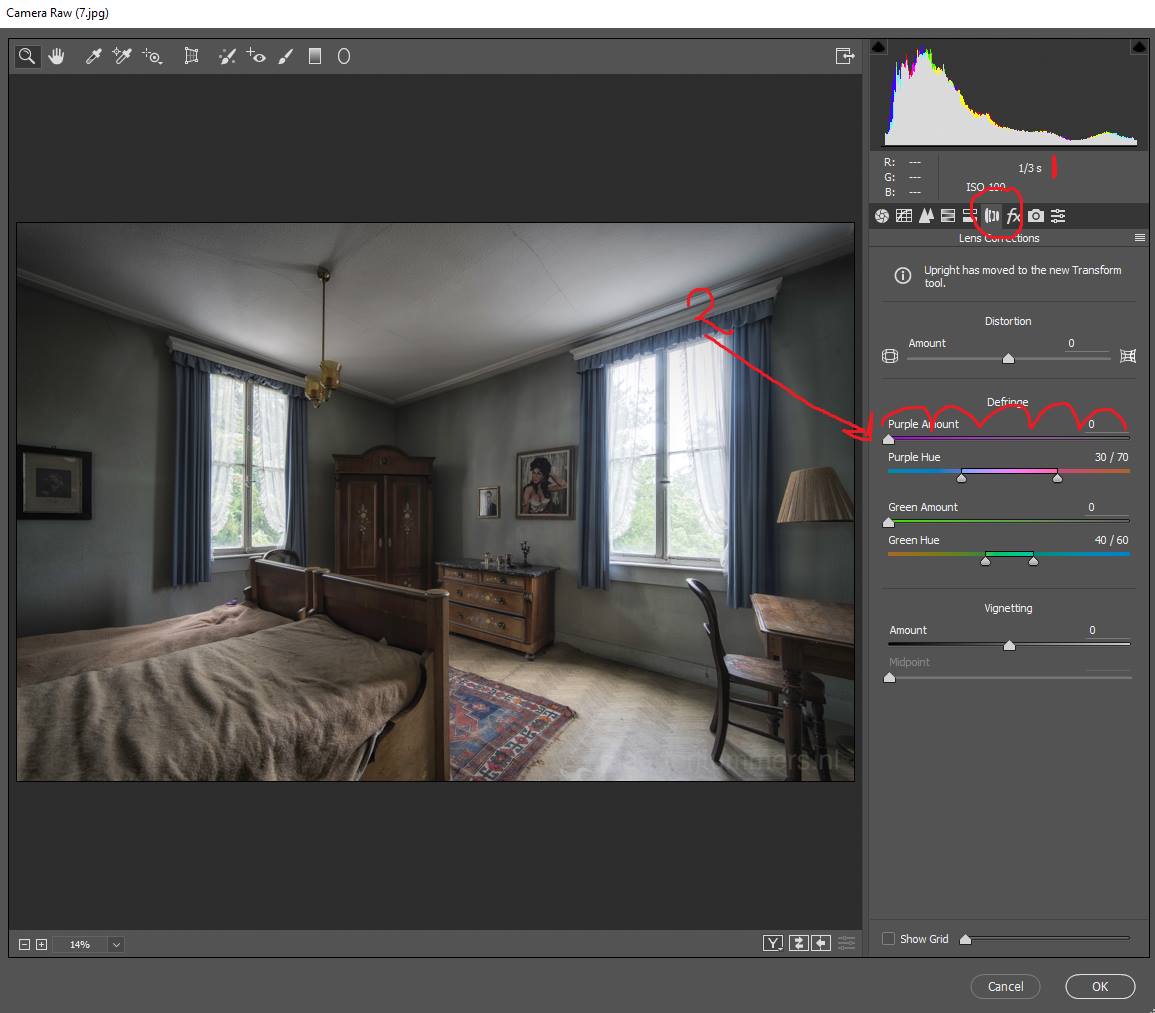
The further you move the “purple amount” slider to the right the less fringing appears in the image.